Friday, July 11, 2014

140702 TimC: From the Workshop...#7

From the Workshop...#7 (from SBAU July newsletter):
by Tim C

http://hubblesite.org/the_telescope/hubble_essentials/
    I believe we are at a point where we talk about polishing and testing. Before we do, I am going to take a brief aside and tell a good story - the story of the Hubble Space Telescope and what happened to it. I will not go into specifics of how the testing
was done. Instead, I'm going to tell you what happened and how a "shower" solved a giant problem. The Hubble telescope became a political football for a time as the huge cost was viewed as wasted money because the main mirror was flawed, and seemingly beyond correction. 
    The Hubble mirror was finished and figured on a ground floor room. Above this was a small, rather awkwardly situated room. This small upper room housed the testing equipment. This design made it possible to test the mirror in place, so there was no need to pick up the heavy mirror and put it on a testing rack. Instead, they only needed to open access to the test apparatus. The “Null Corrector" was an arrangement of mirrors and lenses held to each other with specific-length rods. The only problem was the "field caps" covering the ends of the rods. Reflections from these field caps introduced a 1.3 mm error into the optics. This error was overlooked due to pressures to finish the mirror. The damage was done. The outer edges of the mirror were over-corrected or too flat. 
    So, when the Hubble Space Telescope saw “first light” there was much consternation as to what happened. The views were terrible. How do you go about fixing something like this? Replace the main objective, or replace the corrector mirror, or use a series of corrective mirrors with the instruments on board? Any of these techniques should work but there was no way to get it done. Think of the spacesuits of the astronauts with their big bulky gloves. In principle there was no way to delicately replace the mirrors.
    In Europe a Strategy Panel met to address the different ways of fixing the problem. Jim Crocker, an engineer by training, thought if they could fix the cameras it would solve the problem. Maybe they could place corrective mirrors in front of the camera? But there were several instruments on board. One mirror would not fit all of the instruments’ needs. He went back to his room one night thinking hard on the subject and went to take a shower. The European shower system was unlike those found in America. A rod holds a showerhead in place. The showerhead can slide up or down to adjust to the height of the person in the shower.  During the day, the maids slid the showerhead all the way to the bottom of the rod. As Crocker slid the shower head up and pivoted it outward to be over his head, he had a vision of several different
“showerheads” swinging into position with their corrective mirrors in the light path between Hubble’s secondary and the science instruments. If they sacrificed one of the first generation instruments in place and plugged in this corrective mirror unit, it would fit the simple kind of maintenance the Hubble team had planned for decades. It would work. In fact, and as you may recall, it worked perfectly. Moral of this story: you just never know when or where a solution to a problem will present itself!
see also...http://history.nasa.gov/SP-4219/Chapter16.html

Wednesday, July 2, 2014

140701 TimC's dilemmas

140701 SBAU Telescope Workshop
Attendees: Angela, Paul, Tim, Jerry, Chris, TomT, Mike


> On Tue, Jul 1, 2014 at 10:40 PM, Tim C wrote:
>     Okay guys,   
  
bulge plus TDE insideR?
It happened again.  I put the mirror up on the stand tonight.  It tested out that it has a slight dome overall but it looks like I am also introducing a very small turned edge.  That's okay. 


major scratch...what caused it?
But afterward I decided to check my new flashlight on the mirror surface.  I found the mother of all scratches on the mirror.  This time I can feel it with my nail.  Wow, at first I was bummed out (for some time).  Now I'm just frustrated.  I have never had a mirror come I with so many problems.  I have gone backwards 3 times so far and I was at first thinking I would be unwilling to go back again.  If all you guys think it's okay, I'd like to continue polishing for a while.  Hey, what can it hurt.  I was trying to get this done so the donor could see the results.  Now, I'm kind of thinking I'd like to see the results.  Could be many reasons for tonight's debacle.  Without boring you all with the rundown, I'd like to see if a particle has lodged in my pitch.  That will make it easy. 
indent on pitch lap
Dump the pitch, go back to 320 and bring it on back one more time.  If this is the course I take,  I will definitely keep this sucker.  I'd deserve it.  It owes me.  (Only kidding).  It is a learning experience and as such I am delighted to take on this challenge.  I hope you all will join me to try to figure out what keeps going on.  It is a mystery right now.  Like I said earlier, this has never happened before.  Are there sub-surface bubbles that chip up onto the surface?  Am I dislodging grit from my workplace from under my fingernails?  Am I just not taking care to keep a "clean room" atmosphere around my workplace?  All good questions.  I am really sorry you guys for screwing this up over and over.  I am trying to be patient.  I hope you will be patient with me.
>     T
On 7/1/2014 10:52 PM, Dmitrii Z wrote:
> Tim, I am sorry to hear that! How frustrating! Hang in there, though. We must not let each other give up.

TT: see more photos/vids, full size, at Flickr link.
JerryW analyzing TimC iris adapter...let's see what happens if we take it apart!
peg holes for tool mirror holding on work board
 

Chris asking Jerry for star hopping help

Paul showing Starry Night Pro Plus

PaulW Seahorse nebula astrophotography


Sunday, June 8, 2014

140608 TimC next workshop invite

On 6/8/2014 7:40 AM, Tim C wrote:
Greetings,
We are scheduling a workshop this coming Tuesday, June 10th. Hope you can join us. ... We are continuing projects.

I will be testing a new surface I put on my work board. I drilled new dowel holes on my board that will handle 6,8and 10" mirrors and tools. I then coated it with a water based polyurethane. These holes are located so you can wedge a mirror or tool on top the board so it will not move. I have been using Jerry's trick till now of putting plain newspaper on the work table. Spray the newspaper and it becomes the perfect surface to work on. At the end of the session you simply roll up the newspaper and the mess is clean. Now I am polishing there is a lot more lateral force on the work surface. It may need a little more staying power, hence the dowels. But have I blown it? Will the slicker surface create an "ice rink" for the disks? Let's find out Tuesday. 

Also, we may have a discussion on building testers. I am toying with updating a tester I've been using for years. I'd like to build one like Tom is using. The light source is what I'd like to improve on. With mine I cannot pot it down in intensity. Tom has told me I need to use a different set of resistors to bring the ability of the potentiometer up to our standard. You want the light source to go from bright to all the way down to just lit up. As well as this I'd like to create an ability to go from fully open light source to a pin point or slit. I think we can do this easily. So, if you can join in please do so.
T

Wednesday, June 4, 2014

140603 From the Workshop #6...Tim C

From the Workshop #6...Tim C from SBAU June, 2014 newsletter:

Let's review briefly. We have a tool and a blank that will ultimately become a mirror for our reflecting telescope. We would like our blank to end up an 8", f/6, mirror. This translates to a focal length of 48” and a radius of curvature of 96". At this point we are using 60 or 80 grit silicon carbide to grind our blank to the desired focal length. Our mental state at this stage is optimistic: (1) this blank will become a fine mirror that we will place in a great telescope, and (2) any errors at this point can be redone. How do we know when we have reached focal length? Recall in workshop #4 we used a basic equation to find the depth of our curve of our mirror:  s = r2 / 2R.  Using this equation our 8" mirror will have a Sagitta at its center of .083".  Conveniently, this depth at the mirror’s center may be approximated by the thickness of a drill bit resting under a straight edge. As an example, a 5/64” drill bit has a thickness of .078". Although this drill bit is a “bit” undersized, it can still be used as a crude guide to tell us when to stop grinding since we are near the desired focal length of our mirror. When this depth is reached, a straight edge will easily slide over the bit without rocking. This is a good mechanical test. But we need a test that is a little more precise. We need some kind of optical test. Consider the following.

Wet the surface of the mirror, and go outside when the sun is reasonably high in the sky. Reflect the sunlight onto a surface and watch the image that your “mirror” makes. As you move your mirror toward and away from the surface you will see a spot that becomes larger or smaller. Stop when you see the smallest spot. Measure the distance from your mirror to the surface. Since the sun is essentially an infinite distance away, you have just determined your mirror’s focal length to a precision of an inch or two from the desired target of 48”.  Until we bench test your polished mirror, this is one of the best ways to estimate your mirror’s focal length!

Once you achieve your desired focal length, reverse the roles of the tool and the mirror in order to maintain your mirror’s focal length. With the mirror on top (MOT) you affect the center depth of the mirror. Working with this positioning will tend
to preferentially deepen the center of the mirror, and thus shorten the focal length of the mirror. When the tool is on top (TOT), the mirror’s focal length is increased. Alternating the two positions allows us to (1) maintain the desired focal length and (2) smooth out any aberrations on the mirror’s surface that do not conform to a sphere.  We will use this technique all the way through our list of finer and finer abrasives. Our mirror will become smoother and smoother as it becomes more and more spherical. Ultimately we will move to Aluminum Oxide, a lapping powder, in order to
smooth our mirror even further. But, even after this fine course of material, our mirror will still not reflect light when it is dry. In future issues I will discuss polishing and figuring your mirror and the tests we use in the workshop to determine the quality of your mirror.

Sunday, June 1, 2014

140601 TimC

On 6/1/2014 10:57 PM, Tim C wrote:
Greetings all,
We are scheduling a workshop for this week, Tuesday, June 3rd. Bill, would you please have the east gate open. If any of you need to drop off bigger items to the workshop, you may bring them down and then park back In the Museum parking lot till the workshop ends. We will try to help bring your projects back to your cars at the end of the class.
As usual, we meet at the Broder Building across the creek at the Museum of Natural History. We normally meet from 7:30-9 pm each Tuesday.
Way back last year Javier received an 8 inch mirror as a donation. This person only requested we show him our finished scope. I am delighted to say I am now in the final polishing stages of this mirror. I changed the focal length of this mirror from a much longer length to a much shorter one. In fact, it is shorter than we originally thought. It is now an f/3.92. We targeted an f/5.5 but found it to be shorter. As such you would think we are disappointed but, no we are pleased. This will be a fine scope. We have received some parts members have donated to us for our project. After a few set backs, I am finally polishing and looking now to the business of designing and building a Dobsonian type reflector for our mirror. As John Dobson passed away just a few short weeks ago, this will serve as a fine testament to his memory. I hope you will join us by participating and putting this together. 
In the meantime, there are many projects coming to fruition. What is fascinating is that all of our projects are in a finishing stage of polishing and figuring. It is an exciting time for you all to see the many nuances polishing and figuring has to offer the mirror making process. Coinciding with this, some of our articles in the newsletters will indeed deal with the testing of these optics. This is where the rubber meets the road- where the theories meet reality. We will take these pieces of borosilicate glass, polish and coat them with aluminum, to reflect and magnify starlight received from eons past and deem to understand them. Not interested in that? Well, maybe you may find answers to questions you have in astrophotography. Let's say you have an urge to understand how to image stars in the night sky, or current events taking place in the night sky. For instance, in early July asteroids Vesta and Ceres will appear to come close in space. Want to image them? We have experts to tell you how.
 Please feel free to come join us.
T

Friday, May 30, 2014

140527

140527 SBAU Telescope Workshop
Attendees:  TimC, TomW, JerryW, PaulW, MikeC, EdK, TomT

TomW made Ronchi pattern printout based on
his mirror's f5.9? final shape using macRonchi program.
More pics/vids at:
https://www.flickr.com/photos/27241501@N03/sets/72157644849872496/
MikeC's pitch lap divot; white coating is embedded cerium
oxide on the pitch lap


MikeC w/ HP waveguide carriage
as a base for a possible mirror test setup
MikeC 10inch Ronchi pattern...center not polished due to
pitch lap center divot?


EdK chordal polishing starting to smooth out outer ridge?

TimC donated 8 inch mirror 1st polish Ronchi result

PaulW showing TomT use of Registax5 program for bringing
out Jupiter moon shadows from Celestron NexImage5 frames

TomW getting TimC to use glycerine and detergent in polishing
compound to avoid stickage (worked for Sam grinding 10in)

Wednesday, May 21, 2014

140520 TimC comments

On 5/20/2014 11:21 PM, Tim Crawford wrote:

 Well, was that cool or not! We had 12 people including three students from UCSB tonight. I ground a little with my newly trimmed tool and freshly beveled Pyrex disc. The scratches and gouges are disappearing slowly. Paul mentioned one thing tonight very promising. Some of the lighter scratches and lesser gouges will disappear in the polishing stages. At that point we are smearing glass around at a molecular level. I think these were great comments that we can test in time. Thanks Paul!

Tom poured not one but TWO laps tonight. Thanks Tom!!!!!! We set up two different mirrors on the test stands. Both are on track to becoming great mirrors.
 Remember, we are working with wavelengths at this point- although the Ronchi patterns look sometimes different from ideal, they are very close to the end. It is just tweaking from here. There is a tendency to get overwhelmed by what you see through the tester. Do not be discouraged. You are very close! Stay in there. Don't rush- enjoy it. In the end, the absolute joy in looking through optics you have crafted is nothing short of spectacular.


At the near end of polishing, the laps Tom is pouring for us are just fabulous. In the past we poured pitch into dams created by using masking tape on the tools we were grinding with. Now, Tom and others are using molds they have purchased. But I'm the hands of a craftsman, these new laps can look flawless and clean! A true artist preserving an art form that would be easily lost in time if there were not people like you Tom.


My new disc that Christopher gave me, complete with a "king tooth" drawn on it is just great. I am pleased to say the Cerium Christopher purchased looks like it is going to be just fine. I was getting nervous with the deep red color of the Cerium. I thought it might be less than optical grade, but with just a little touch tonight, I realized it is really fine material and dispersed in water it looks a lot less red. It's good stuff. What a pleasure this class has become. Thank you all for your participation. We missed Jerry tonight. That would have made it an 11 on a scale of 1-10. Hope you are okay Jerry. We miss you. T


 [ChrisU small pitch lap tool not set to match his mirror, so contact surface shows spots of polishing compound in center of each square of pitch...possibly heat caused each square to sag?  tt]

[see more photos/vids: https://www.flickr.com/photos/27241501@N03/sets/72157644761492162 ]

Monday, May 19, 2014

150518 TimC mirror scratches continued

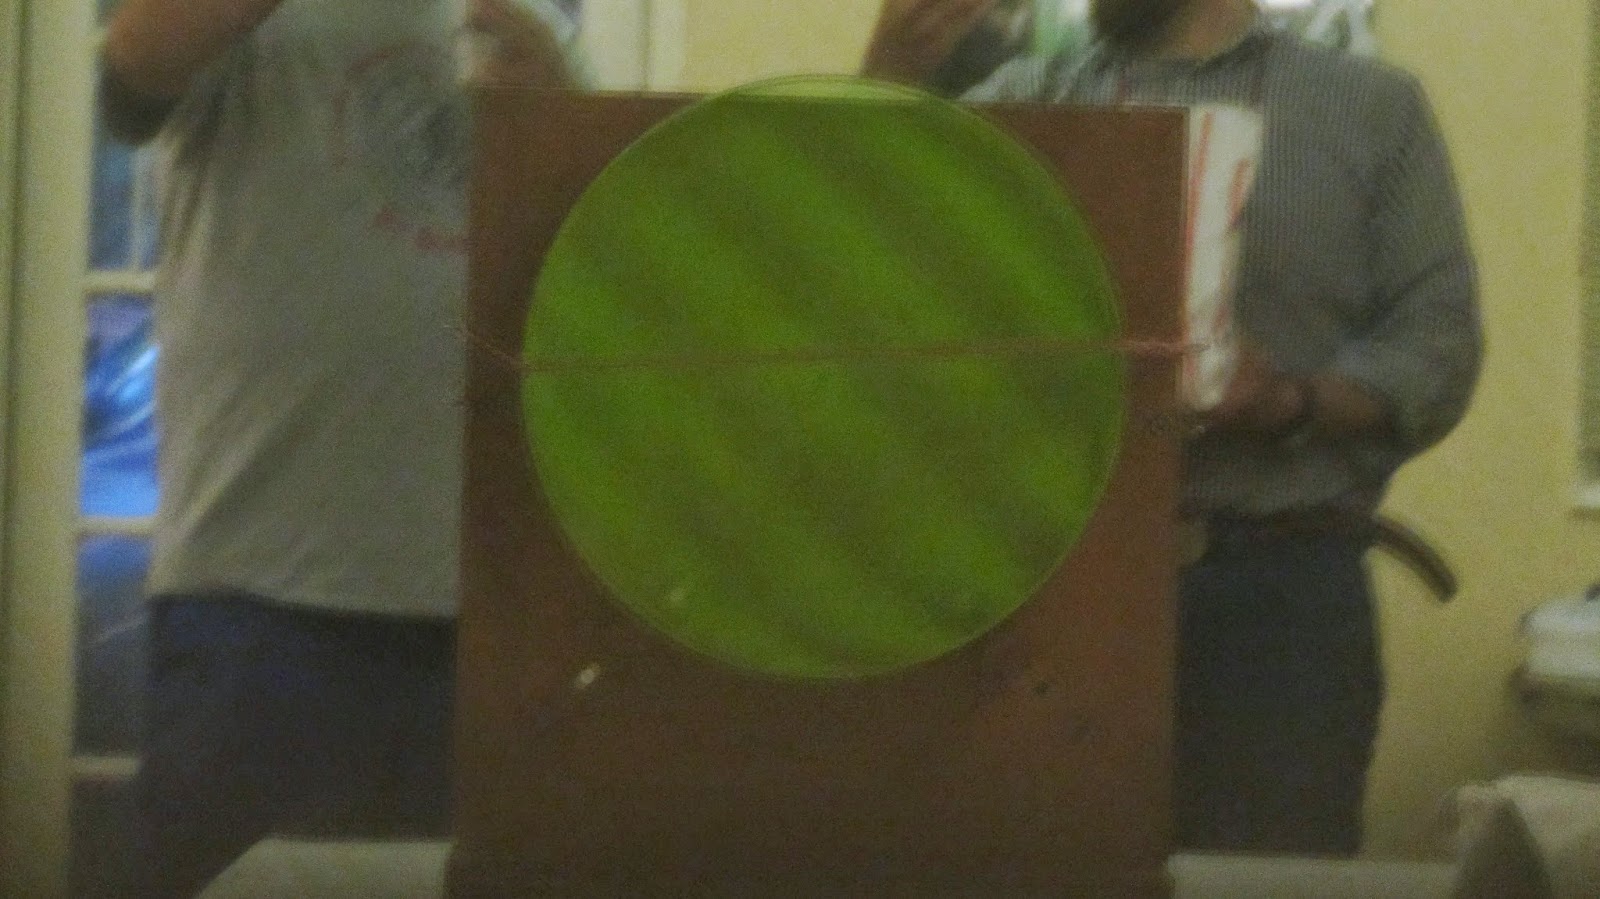
Greetings all,
We are scheduling a workshop for this week, Tuesday, May 20th. Bill, please have the East gate open for us? Thanks Bill. Please remember all, 2 cars only across the bridge. You may drop off heavier equipment at Broder and go park back in the lot. At the end of the evening  we can help transport your equipment back to your car. 

I had the incident happen again where something created a scratch in the mirror I am working on. I am saddened, frustrated and fascinated all at the same time. I would like your help with this. I've never had this happen before and I have decided to the right thing here and track down what is causing this to recur. Here is a pretty obscure image:
 
 
I did feel the edge grab this time. The brighter blip in the photo is a sub surface bubble. My first impression is that this is the tiles at the edge of my tool that are breaking off. There is no chip at the edge of the mirror although the bevel has gotten much smaller. Rather than grossly rubbing the edges with a sharpening stone, I will take these to work and use my dental hand piece with a diamond disc to soften the edges and create a new bevel. In our dental lab we deal with different alloys that have specs like Brinell Hardness or Vickers Hardness. In the workshop I think it will benefit our knowledge base if we can specify the hardness of Pyrex and the tools we use. In this case it is sheet tile purchased from the local tile shops. They come in sheets that are tied together with a webbing I think is rubber or nylon. Would it be better to have a softer tool material in case of fracturing or would that matter? Once a small chip of tile releases onto the surface of the mirror, it tumbles and my theory is it gouges the surface. I am not sure if a softer tile would leave the mirror untouched. Anyway, enough of this for now.

Christopher cut a round of plywood for me to create a pitch lap on. Thank you Christopher (cool picture you drew on it). I covered this with epoxy. It turns out we can get the better epoxy from Home Improvement Center. I tried Home Depot and OSH. They both dropped carrying Devcon materials. They carry Loctite but in an 8-9 ounce package it is inferior. In fact at OSH I talked with an employee who agrees. Too bad customers and employees can't influence purchasing department heads. Too bad cost trumps quality these days.

We may pour a lap- I will check with Tom. We will continue with projects and I believe we will be looking at a Schmidt-Cassegrain this week and trying to clean or plan cleaning the optics. Please let us know if you will need testers and racks this week. Possibly much going on. You may come a little early if you want. I think Bill and the Museum is okay with that. Please, no sooner than 6:30 though, I think that is the time we okayed. I will put out an email if it is not. Thanks all! The workshop is going great. We had 10 last week. Let's keep going and please remember, let's leave Broder better than we found it.
T 

140513

140513 SBAU Telescope workshop
attendees: TimC, TomW, PaulW, JerryW, DmitriiZ, TomT, MikeC, BruceM, EdK, Matt

Paul waiting outside Broder building at the Santa Barbara Museum of Natural History Mission Creek redwood tree and boulder area.
 Bruce machined laser pen holders for 1.25" eyepiece slides.
 TimC marked mirror with felt pen to examine after grinding to see if contact with tile tool is even.
 Santa Barbara Astronomical Unit Telescope Workshop crowding around TimC doing all the work.
Bruce showing Matt his C8 SCT telescope cleaning methods that had been recommended by PaulW.

Saturday, May 3, 2014

140503 From the Workshop #5...by TimC


140503 From the Workshop #5...by Tim C
Starlight comes to our telescopes from afar – essentially from infinity. This means that light comes to our scopes as parallel light. So, if we finish with a spherical mirror, will this be good enough? It turns out that, since we need this parallel light to converge to a point, we need our finished mirror to have the shape of a parabola. In the figure below the solid line represents a sphere, and the dotted line, a parabola. Imagine that the parallel rays of light fall onto the surface of these two figures. What happens to them after reflection?  For the sphere, these rays do not come together at one point. But, in the case of the parabola, they do.  Recall that in a previous article, you were asked to stand at the center of a sphere, holding a candle and to watch what happens to the reflected light. Since this light emanates from a single point (the radius of curvature of the sphere), it returns to this point after reflection. Starlight doesn’t enter our telescopes from one point. So, ultimately, we have to change our mirror’s figure to that of a parabola. How do we do this in our optical shop? 

It turns out we achieve different shapes for our mirror’s surface by using different grinding patterns as we fashion our mirror. There are many resources you can go to that demonstrate these principles.  One great one is the Stellafane website at www.stellafane.org. Let’s get back to business: we have our 8" flat blank and our grinding tool.  For simplicity let’s assume our tool is a piece of plate glass covered with tiles glued to the glass. Begin by placing the tool face-up on the work surface. Spray a little water on it and sprinkle its surface with 60-grade Silicon Carbide. To preferentially grind the middle of your mirror, start with the chordal stroke.  The mirror is always on top for this stroke. And the tool is always on the bottom. Much of the mirror “hangs over” the edge of the tool so that the center of your mirror will frequently pass over the outside of your tool. This will cause more wear on the center of your mirror and, likewise, more wear on the outer regions of your tool. Your mirror becomes concave as your tool becomes convex.  Walk around your work as you grind. As you move around your work in a clockwise fashion, turn your mirror counter-clockwise. This “organized randomness” is actually the secret to mirror grinding. To me, it is one of the processes that, although simple, makes this process so elegant.
[from May, 2014 SBAU newsletter]

Tuesday, April 29, 2014

140429 TimC Telescope Workshop comments

140429 TimC Telescope Workshop comments

On 4/29/2014 11:25 PM, Tim C wrote:
Greetings, Tonight's workshop was once again a good time. We had 6 people show tonight. One was a new member that had come to us from our website. He has acquired an older LX3 Meade Schmidt-Cassegrain 8" scope and tripod. The reason for his visit was that he can see what looks like mold or fungus on the optics that has been put away, dormant for a long time. I recommended he talk with our equipment rangler to get a little guidance on trying to get this up and running. I will BCC this email to all of interested parties. I think he will be leaving SB in the near future and he would really like it if his wife could get a look at the rings of Saturn before he leaves, I think we can help that to happen.

Anyway, the other reason for the email is to let you all know once again that this kind of email you will get that informs us all if and when we will meet for a workshop. These normally take place on Tuesdays from 7:30-9 pm in the Broder Building, across the creek at the Museum of Natural History. These fine people at the Museum allow us to meet here on a regular basis to advance our skills of mirror making, scope building, Astro imaging and just about everything else that envelops the world of optics and scope building and testing. Please feel free to come by and see what we are about. We will surprise you, I promise.
T
 On 4/30/2014 8:42 AM, Tim C wrote:

Hi TomT, Sorry you could not make it. I worked for a very short time last night because a new person showed up. His name is Matt. I asked how he came to find our workshop. He said he googled SBAU.org and found out about our workshop. That's pretty cool huh. I don't know if I'd use his name in the blog without permission as I told him I'd use his email address in a blind fashion. [first names + maybe last initial is enough and keeps privacy. tt]

I think what was striking about last night is that he has inherited an older LX3 Meade 8" Schmidt. It has been sitting around though for an extensive time so it has gotten some fungus or mold on the optics. Matt will bring this scope next week and we may take a look at it. As I am not an expert on Schmidt-Cassegrains and certainly not abreast of the techniques for removing mold, I let Matt know that we will refer the issue to Art, Tom W. A and Jerry. That was one thing.
Mike also brought this light you see below. It looks really nice for a light source for our testers. The only thing is it has to be pointed right at the mirror or you don't see it. It kind of has a long barrel. Mike has some ideas on this.


Christopher brought in his mirror to start polishing but he didn't do anything. Next week he will bring a work surface and clamps to tie it down and begin trying to correct his edge on his mirror. Tom and Jerry will advise him of strokes to use. T

Tuesday, April 22, 2014

140422 Earth Day NASA #GlobalSelfie SBAU Telescope Workshop

Santa Barbara AU ‏@SantaBarbaraAU   #GlobalSelfie 2014 Earth Day NASA by SBAU Telescope Workshop mirror SBMNH Science Center Jupiter Magic Planet globe pic.twitter.com/GlA46lrKrk
On 4/23/2014 8:57 AM, Tim C wrote:    Greetings all,

Thanks for coming on by last night. We had to move to classroom 1 because of a mixer that had been scheduled for Broder. This is an example of what I have alluded to in the past. From time to time we have to give way to events that are scheduled ahead of time in Broder. Much thanks to Bill C who tried to give me advanced notice. Sorry Bill- I did not give you my new number and that is now corrected. Bill made it so easy for us to shift over to the classroom. I want to let you all know, the classroom is the fallback room we use in case Broder is busy. I try to leave a note on the door of Broder ( the door nearest the footbridge) telling where we will be or if (as in some rare cases) the workshop will be cancelled.

    Once we carefully moved a couple of items from 2 tables, we set up a Ronchi test for Christopher's 10" mirror. (Used to be Chuck's "Mr. Peanut".) Wow! Chuck had really come a long way since I last saw this mirror! Part of my reason for the follow up email is to inform 2 head pros in our workshop, Tom W. and Jerry W. of the results we looked at. Christopher is using a sub diameter lap to polish this mirror out and some of the correction strokes, I am not qualified to answer to. So, Tom and Jerry ( I always like saying that), we saw an almost perfect sphere that has a turned down edge way out at the 97-100% zone.

For you in the workshop unfamiliar with what I am talking about, the dreaded "turned down edge" is a typical result of grinding and polishing your own mirror. Imagine your polishing your mirror and testing it with a glass slide that has etched lines that are parallel. If your mirror is perfectly spherical, you will see parallel vertical lines extending from edge to edge. But, if those lines turn at the edge, you have a turned down edge (TDE). Tom or Jerry have always told me that you must not think of the edge as low but instead think of the adjacent zone as high. Okay, now confused? Just think of this. What Chris will want to do to correct this is work on the adjacent zone to the inside of this turned edge. Work it all the way around the mirror, just as you would polish by using strokes that are predictably random. Now if you think about it, this will lower the adjacent zone to the level of the edge and now you have corrected the edge. I can hear you all say, "but the middle has not been worked on and now you have a high middle". Correct! But it is much easier to correct the middle than a TDE. What type of stroke to use and for what duration, I will leave for our experts. Tom Totton took some images of this last night and if he would be so kind he may send these to Tom and Jerry to look at.

    Last night, speaking of TomT, we also took a photo of members of our group in the Planetarium. It was really fun watching Tom set up a make shift platform for his timed shot and scramble over to get in the picture. He had to fiddle a bit to get the big planet Jupiter to show in the photo. This added some seconds to the shot. Tom kept leaving the shot early and we really enjoyed his ghost like figure leave the photo. One thing I thought of only now Tom is that this was in honor of Earth Day and you used Jupiter in the photo. Now we'll have to wait another year to set it up again!

    Anyway, a good time was had by all. Paul W asked me a while back to get permission to use images and diagrams from the Stellafane website. I told him last night they just responded and told me it was okay as long as it is not in a commercial form. I want to finish though by thanking Paul for all his hard effort on the club website. He told me last night he just completely re-did the whole site (40hours +!!!!!) thank you so much Paul from all of us. You members out there, spread the news. And use the forum! In fact, Tom W. told me members are using the newsletter to sell equipment. Please know you can use the Forum and reach a whole lot more people!

    See you all soon. Remember, May 10th is Astronomy Day. We will be out at Calle Real  Market Place. I have a permanent shoulder injury and it would be great to see a few of you spell me with mirror grinding.
    TimC

Wednesday, April 16, 2014

140415

140415 SBAU Telescope Workshop
attendees:  JerryW PaulW TomT TimC DmitriiZ ChrisU

Jerry clarifying difference between pixels & detectors on camera sensors as TomT was questioning why Paul will be getting a mono camera and selling his QHY10 color.  http://www.qhyccd.com/

"Digital color cameras generally use a Bayer mask over the CCD. Each square of four pixels has one filtered red, one blue, and two green (the human eye is more sensitive to green than either red or blue). The result of this is that luminance information is collected at every pixel, but the color resolution is lower than the luminance resolution.
     Better color separation can be reached by three-CCD devices (3CCD) and a dichroic beam splitter prism, that splits the image into red, green and blue components. Each of the three CCDs is arranged to respond to a particular color. Many professional video camcorders, and some semi-professional camcorders, use this technique, although developments in competing CMOS technology have made CMOS sensors, both with beam-splitters and bayer filters, increasingly popular in high-end video and digital cinema cameras. Another advantage of 3CCD over a Bayer mask device is higher quantum efficiency (and therefore higher light sensitivity for a given aperture size). This is because in a 3CCD device most of the light entering the aperture is captured by a sensor, while a Bayer mask absorbs a high proportion (about 2/3) of the light falling on each CCD pixel."

TomT brought up new Celestron RASA Astrography 11" telescope: http://www.optcorp.com/telescopes/astrograph-telescopes-1/celestron-11-rasa-rowe-ackermann-schmidt-astrograph-ota.html  But some reviewers asked why be limited to a non-visual capable telescope.

Paul showed his photo collage taken during the lunar eclipse late Monday night.

 Dmitrii polishing his 12.5 mirror; Jerry says it needs 3 hours more to smooth it, then pay attention to the surface figuring.

Tim showing star hopping PowerPoint slideshow to Chris and all.  He has some funny cartoon pictures on the charts to make them more memorable.   Tim is also putting time in on grinding the 8" donated mirror, minimizing any concern with the pits left previously.

Chris came by to visit, even though he was under the weather.